
Using Classroom Technology
Download the Using Classroom Technology User Guide
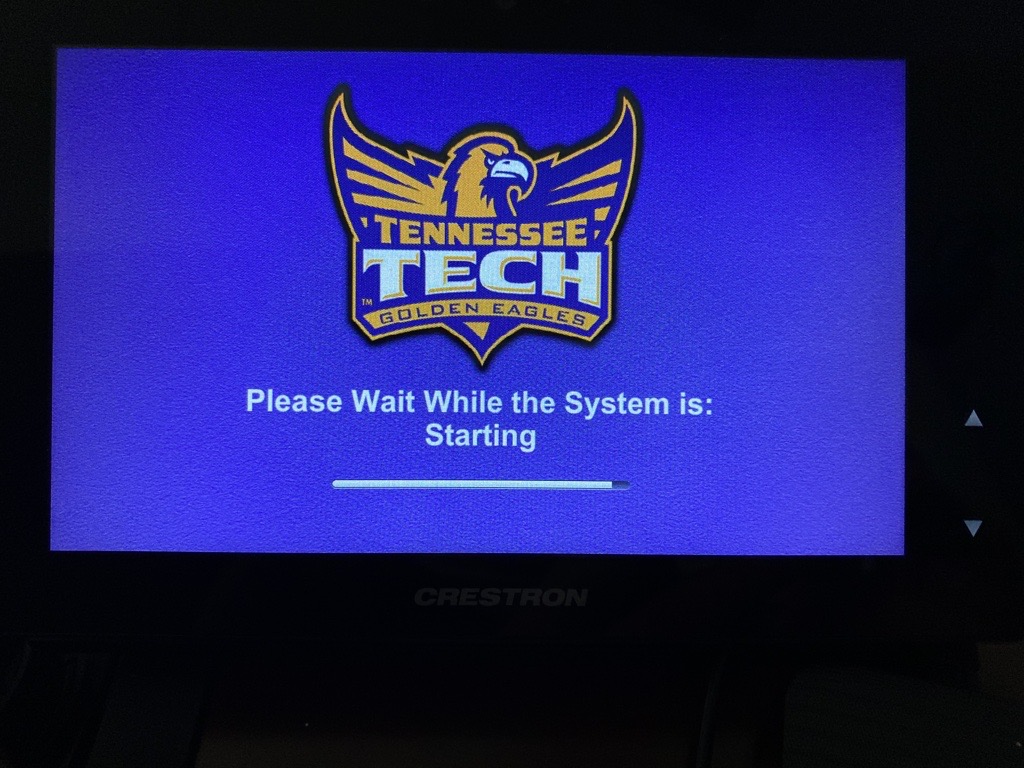
Turning on the Teaching Station Technology
When you walk in a room, you will either see a button panel or a touch panel on the podium. In each room there is a computer (PC) on the teaching station along with other technology.
Button Panel |
Touch Panel |
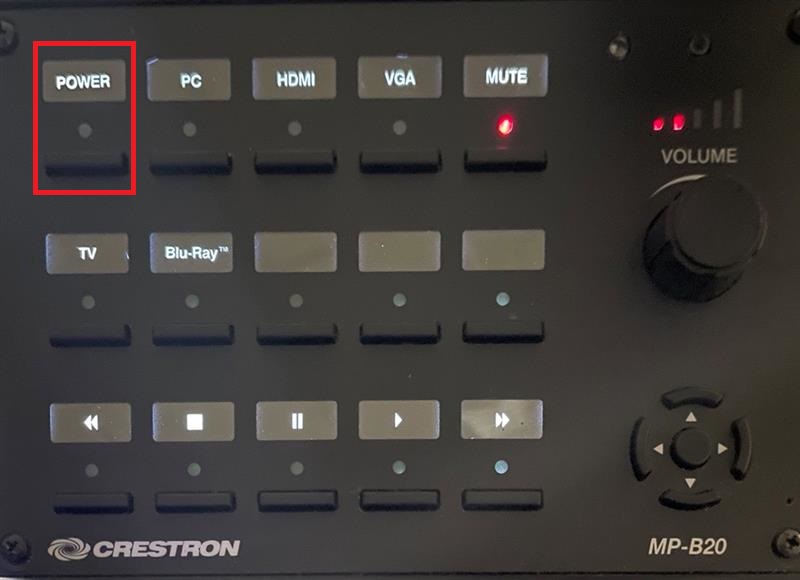
| Select the Power button in the upper left corner. | Touch anywhere on the screen to power on the system. |
 |
 |
Using the PC on the Teaching Station
Once you have powered on the system, login to the computer on the teaching station using your Tennessee Tech credentials.
Button Panel |
Touch Panel |
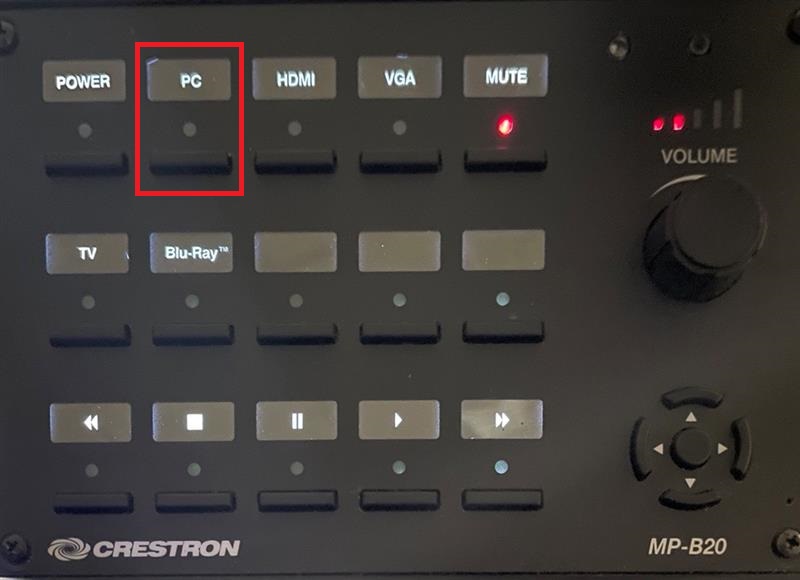
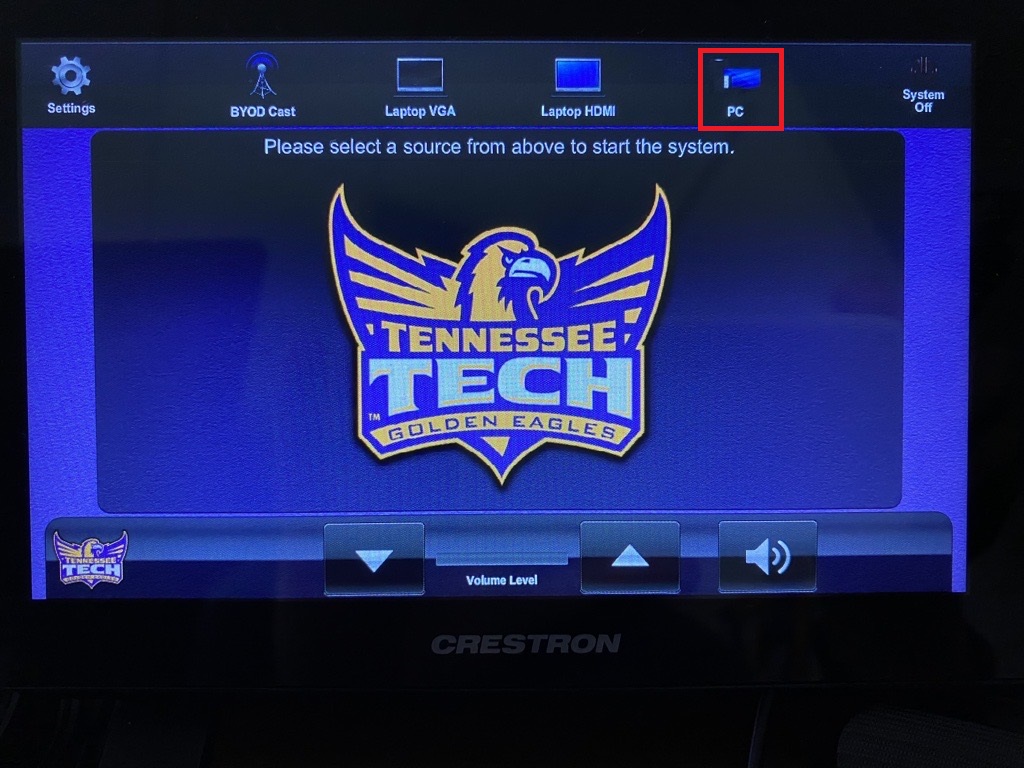
| Select the PC button. NOTE: Depending on the model, the PC button may be the second from the left on the top row. |
Select the PC button. |
 |
 |
Using Your Laptop
If you would like to use your laptop to present, first, power on the system.
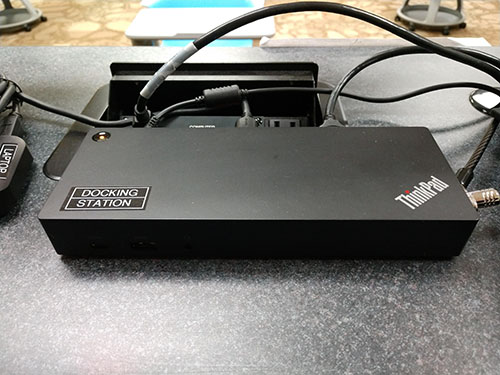
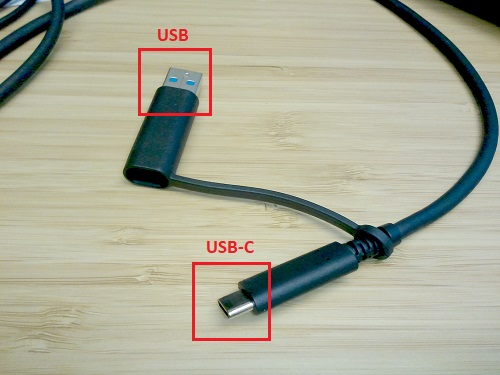
Connect your Laptop to the Docking Station
Select the connector cable from the Docking Station and connect it to your laptop. The cable is easy to spot because it has an adapter attached that can convert the USB-C connection to standard USB-3.0 ports for use with devices that don't have a free USB-C port.
 |
 |
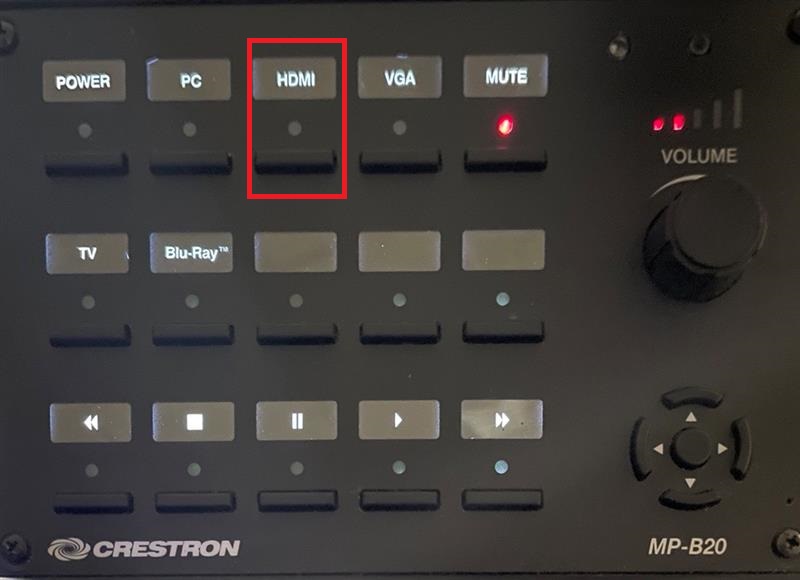
Button Panel |
Touch Panel |
| Select the HDMI or Laptop HDMI button on the panel. NOTE: Depending on the model this button may also be located in a different place on the panel. |
Select the Laptop HDMI button |
 |
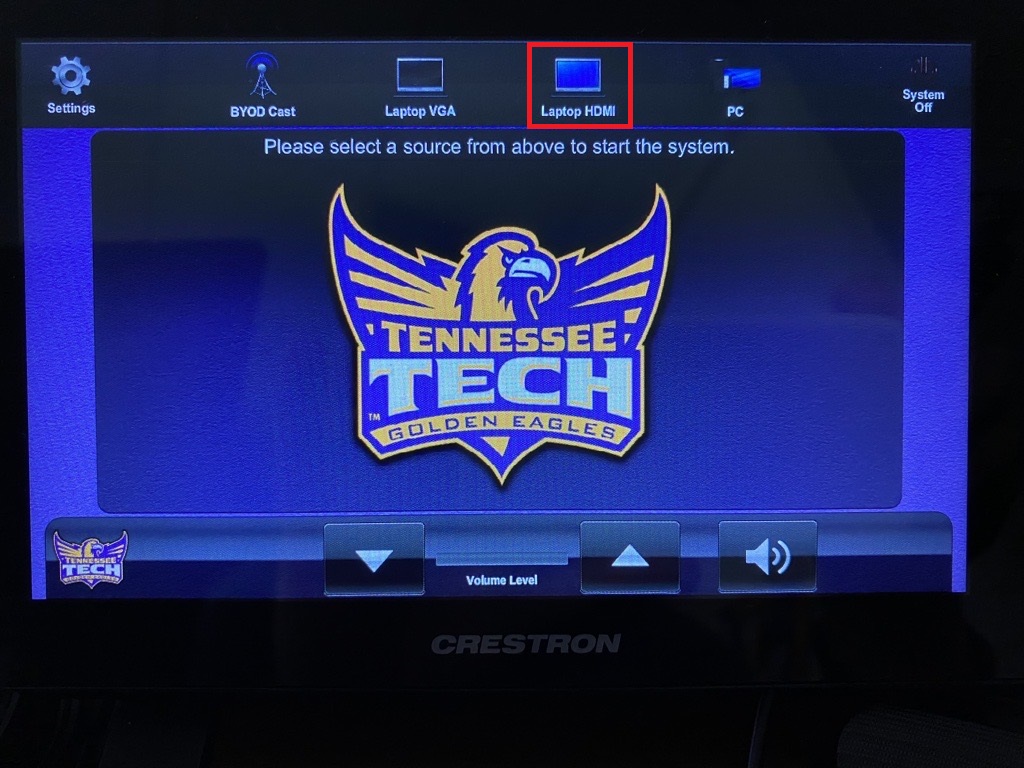 |
NOTE: The laptop button will be some combination of Laptop and/or HDMI on the different control panels.
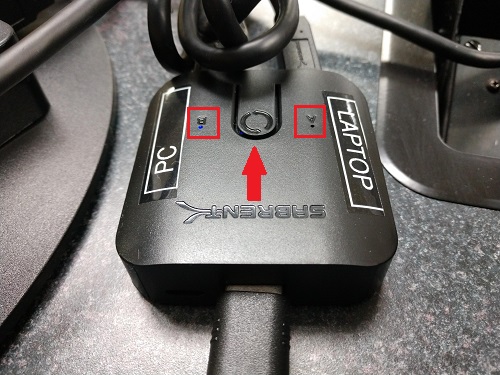
Switch the USB and Devices to the Laptop
When using a laptop, you will want to make sure the correct device is selected on the USB switcher (shown below). There will be an A (Laptop) and a B (PC) with a small blue light signifying which is selected.
By doing this, it will connect your laptop to any USB devices connected to the teaching station (for example: IPEVO document camera, Polycom video camera, external DVD player, USB Hub, and others) so you can use them with your laptop. While most rooms are standard, some may have different hardware available.
- My Apple Device is Still Not Showing
You may need to install the DisplayLink driver (this is especially common for devices running macOS that are not managed by Tennessee Tech).
If you are using a personal computer, you can download and install the DisplayLink driver.
- Launch the DisplayLink Manager from the Applications folder.
- Agree to allow DisplayLink Manager software access to screen recording.
- System Preferences - Security & Privacy, select the Privacy tab, check the box next to DisplayLink Manager under Screen Recording.
- Right-click on the toolbar icon and set DisplayLink Manager to launch upon login. This will allow you to connect to the dock easier next time.
Learn more about installing DisplayLink Manager on a Mac.
If you are using a Tech device, it should be installed. If not, please check the Software Center (Windows) or Self Service (Mac).
Additional Assistance
Don't see the answer to your question? Contact the ITS HelpDesk at 931-32-3975.
- » Is the presentation not showing on the projectors?
Make sure that the displays are set to Duplicate.
On the keyboard, select the Windows Key + P and select Duplicate. This should resolve the issue.
This could also happen where the projectors show the presentation and not the monitor. Use the same steps to resolve this issue.
Touchscreen: Select Interactive Monitor
- » Don’t see the cameras in your list of devices?
Make sure that USB Switcher is set to the appropriate option, A (Laptop) or B (PC).
- » The laptop is not showing, even after plugging it into the docking station.
You may need to install the DisplayLink driver (this is especially common for devices running macOS that are not managed by Tennessee Tech).
If you are using a personal computer, you can download and install the DisplayLink driver.
- Launch the DisplayLink Manager from the Applications folder.
- Agree to allow DisplayLink Manager software access to screen recording.
- System Preferences - Security & Privacy, select the Privacy tab, check the box next to DisplayLink Manager under Screen Recording.
- Right-click on the toolbar icon and set DisplayLink Manager to launch upon login. This will allow you to connect to the dock easier next time.
Learn more about installing DisplayLink Manager on a Mac.
If you are using a Tech device, it should be installed. If not, please check the Software Center (Windows) or Self Service (Mac).
Coming Soon!
Have a question that isn't answered on this website? Let us know!
Email citl@tntech.edu
Having technical issues?
If you are experiencing any problems using the classroom technology, call the HelpDesk at (931) 372-3975.
Need to learn more about how to use the room effectively in your class?
If you need training or assistance learning how to integrate the different technology into your teaching, contact the Center for Innovation in Teaching and Learning (CITL) by emailing citl@tntech.edu or call (931) 372-3675.


