
MS Teams Recordings
Teams Recordings Locations
When using MS Teams, you can record your meetings or lectures. After your meeting, the video will process and you can access the video to view or download.
View how to record your meeting in Teams.
- Teams Recording Locations: After October 8th, 2021
Go to the Teams chat area for the meeting or Team. Once the video has processed, there will be a link to it in the chat.
- Select the … icon to the right of the video.
- Choose Open the video.
- It will ask for verification of who you are (enter your Tech email address).
- There is a Download option at the top of the video.
Using a Meeting Link
OneDrive: If you created a calendar link for the Teams meeting or just called the people through Teams, the video will be stored in your OneDrive account in a Recordings folder. You can access it in OneDrive or once it is processed it will appear in the chat area in Teams. The video will be available to everyone who was present in the meeting.
Using a Team
SharePoint: If you created a Team, the video will be saved in SharePoint in the Documents area under the specific channel (usually General) and then in a Recordings folder.
- Teams Recording Location: Prior to Oct 8, 2021
MS Teams changed the locations of the video recordings and Tennessee Tech updated our accounts on October 8th, 2021. After October 8th, no additional videos can be uploaded to Stream. Your old videos will remain until Microsoft discontinues Stream Classic completely. New Teams video recordings will be in OneDrive or SharePoint. Please see information above.
You have a couple options to put a Teams recording from Stream into iLearn.
Stream to iLearn Media Storage
You can download the video from Stream and upload into iLearn. This gives you the ability to use the options in YuJa for Analytics, internal linking in iLearn and embedding Quiz questions in the video.
Stream Link in iLearn
If you prefer to just share the link from Stream, you will need to make sure that video is available to all the students in the course. If you are using a Teams meeting link, the process will be different than with an actual Team that is created in Teams.
If using a meeting link, the permissions for the video will need to be set in Stream. If you are using a team, anyone with access to the team, should have access to the videos created during team meetings.
You will need to go to Stream and either share it with the class or make it viewable to everyone.
- When in Teams, select the ... icon on the left.
- Choose Stream
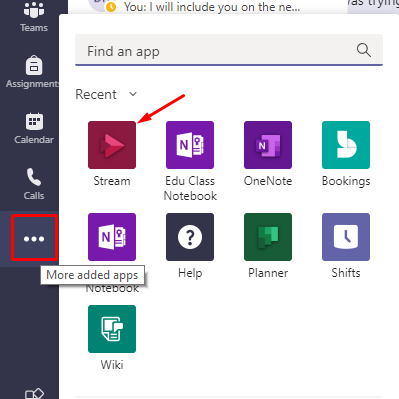
- Select the Microsoft Stream link
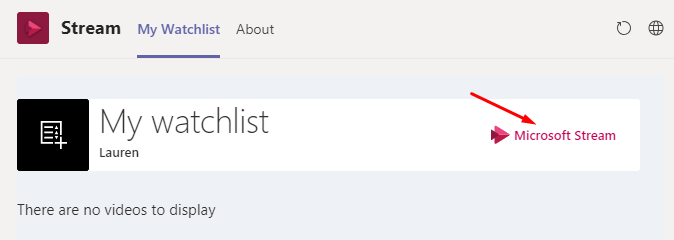
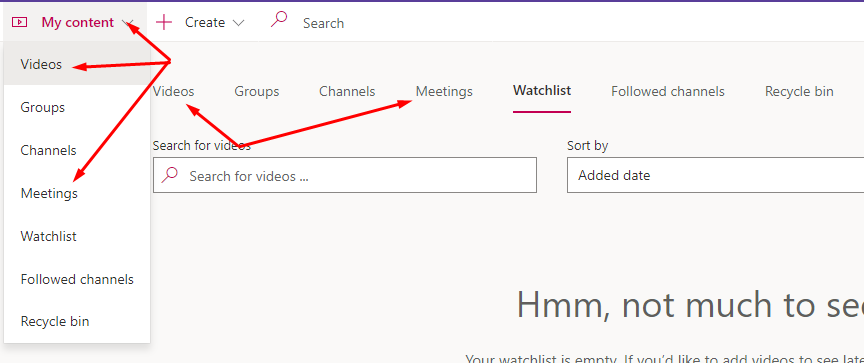
- Under My Content, choose Videos or Meetings. You can also select the Videos or Meetings link at the top of the screen.
- Select the Pencil icon to the right of the video to do the following:
- Set permissions on the video:
- You can add people individually by entering their username,
- Enter your class email list information (Example: ENGL1010-001@tntech.edu).
- Select Allow everyone in your company to view this video
- Adding Captions:
- Select the Video Language drop-down and choose English.
- Set permissions on the video:
To add to iLearn:
-
- Select the Share button and copy the Direct link to the video.
- Go iLearn, choose Content and choose the appropriate module.
- Choose the Upload/Create button
- Select Create a Link
- Add text and paste the URL