Student Video Presentations
Students and faculty can each create videos and post them in a course. However, there are a few options for students to choose from.
Download the Student Video Presentations Guide
Presentation Types
(includes how to create and submit)
- Create a video of a presentation with voice and/or webcam
- Using MS Teams or Zoom for individual or group presentations
- Uploading your media (from external sources such as Zoom, Teams, Phones, etc)
- Create a video with webcam and voice only in iLearn (no PPT or other presentation needed)
Once you create your video, you can then Submit your Presentation to your Course.
Visual Presentation, Voice, and/or WebCam Presentation
You can create videos with YuJa Media that can include audio, video and screen recording. The two options are the Browser Capture Studio and the YuJa Capture Software.
Browser Capture Studio (Web-based)
The Browser Capture Studio allows you to record one audio, one video, and one screen input. It is reliant upon a good network connection, so if you have a slower internet, we recommend downloading the YuJa Capture Software to do your recordings.
Using a Chromebook? You will need to use the Browser Capture Studio.
Learn more about using the Browser Capture Studio
YuJa Capture Software (Download)
YuJa Media Capture is a full-featured screen recording solution. With YuJa Capture, you can record any combination of two recording devices (for example two screens, two webcams, or 1 of each) and a microphone. While recording you also have the option to write or draw on your screen using the built-in annotation tools.
Learn more about the YuJa Capture Software:
- For Windows computers
- For Mac computers
- Overview of the software (don’t forget to enable the permissions for the camera, microphone and screen recording.)
- Creating a Recording
YuJa Capture can be downloaded from iLearn (ilearn.tntech.edu). You can access the installer by selecting YuJa Media and then
clicking on the Create Recording link at the top. 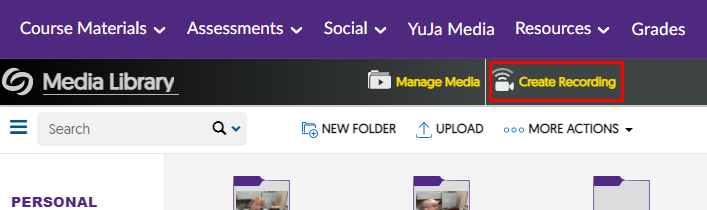
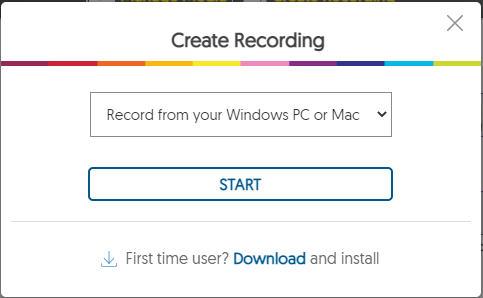
Next, choose whether you will Record from your Windows PC or Mac or Record with Browser Capture Studio, click Start.
If you need to download the software to your personal machine, you can choose the Download link.
- Once you install and open YuJa Capture (through iLearn), you will want to make sure to choose which screen, camera, and microphone
should be used. It will default to your system preferences.
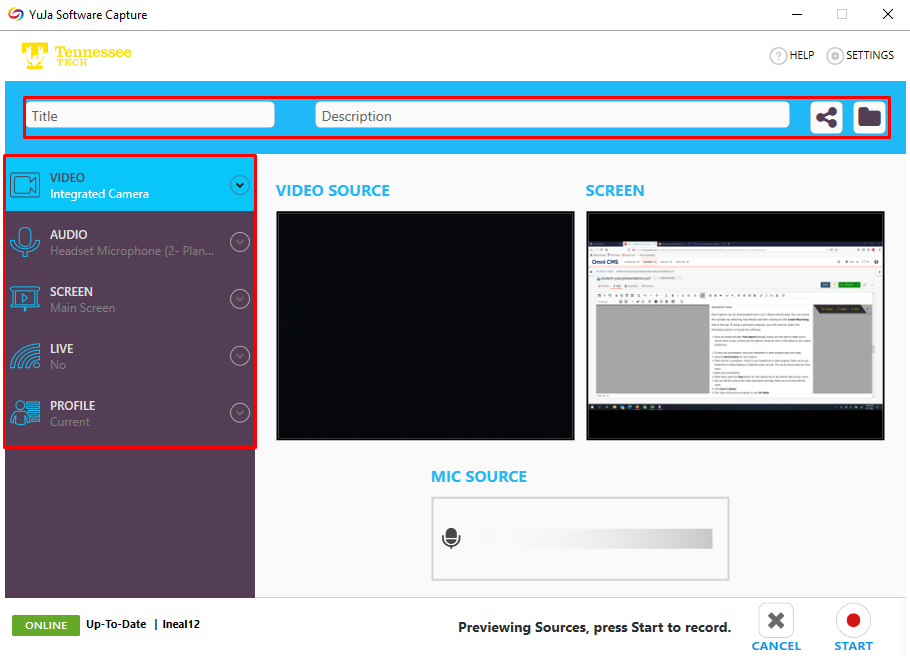
- At the top, you can enter a Title, Description and select the folder where you want to put the video.
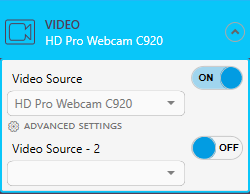
- Choose your Video Options. You can choose up to two video sources.
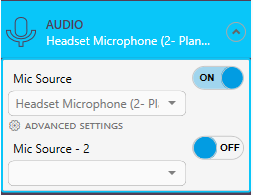
- Choose your Audio Options. You can choose up to two. If you are showing a video through the computer
and recording a microphone, you may want to choose Internal Audio for Video Source
- 2.
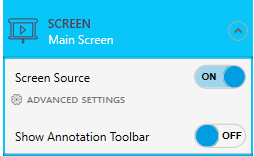
- Choose your Screen Options. You can select the Advanced Settings to choose different options, such as a specific monitor (if you have more than one),
all monitors, or a selected area of the screen.
- If you are presenting a PowerPoint presentation, we recommend having it open prior to starting the recording.
- Click the Start button for YuJa Capture.
- There will be a countdown. Switch to your PowerPoint or other program. Make sure to put PowerPoint in either Reading or Slideshow mode, not edit. This can be found under the View menu.
- Begin your presentation.
- When done, select the Stop button for YuJa Capture bar in the bottom right of your screen.

- Click Save.
- The video will process and appear in your Manage Media area.
Presentations: Using MS Teams or Zoom
If you are needing to do an individual or group presentation and need show your screen while you present, you can use MS Teams or Zoom to do this. If using with a group, there will need to be a designated person who Hosts the meeting. This person will need to setup the meeting, Record the meeting and Upload the video using these processes.
Your MS Teams Meeting: Creating & Recording
- Create your MS Teams meeting link
- To create a link, go to your Tennessee Tech University email through Tech Express. Do not open Teams.
- Select the Calendar option at the bottom left.
- Create a meeting, make sure you are viewing the full options (if not, choose More Options).
- Complete the information with a title, the emails of your group members, time/day, and choose to Add online meeting, select Teams Meeting.
- When you save the meeting, it will add a link to the meeting information.
- For a Group Presentation, invite the other members of the group to join.
- Share your Presentation using the Share Content button . If using PowerPoint, select Reading mode or upload the PPT to your Teams presentation to present.
- Click the … icon in MS Teams and choose Start Recording
- Start your Presentation
- When the presentation is over, click the … icon and choose Stop Recording.
- Once you Stop Recording, the recording will process automatically and send to Stream. You will receive an email when it is processed (if you were the one who created the recording).
Locating MS Teams Video Files
Go to the Teams chat area for the meeting or Team.
- Select the … icon to the right of the video.
- Choose Open the video.
- It will ask for verification of who you are (enter your Tech email address).
- There is a Download option at the top of the video.
Your video will be saved in one of two locations.
- OneDrive: If you created a calendar link for the Teams meeting or just called the people through Teams, the video will be stored in your OneDrive account in a Recordings folder. You can access it in OneDrive or once it is processed it will appear in the chat area in Teams. Only people who were present in the meeting will see the link.
- SharePoint: If you created a Team (adding members and setting up channels), the video will be saved in SharePoint in the Documents area under the specific channel (usually General) and then in a Recordings folder. The video will be available to any member of the channel.
Download the Video to Upload to YuJa Media
- Click the Download option for the file when viewing the video or when you go into OneDrive or SharePoint.
Your Zoom Meeting: Creating & Recording
- Create your Zoom meeting
- For a Group Presentation: Invite others by creating the Zoom meeting and then copy the URL for the meeting and email it to your group members.
- Make sure if someone else needs to share their screen, you enable it by selecting the arrow beside Share Screen and choosing Multiple participants can share simultaneously.
- Share your Presentation using the Share Screen button. If using PowerPoint, select Reading or Slideshow mode (not edit mode) to present.
- Click Record
- Start your Presentation
- When the presentation is over, click Stop button where it shows it is recording or select the … icon and choose Stop Recording.
- Once you End the meeting, the recording will process.
NOTE: This can take some time to process. - It will be saved to your Local drive (see below for where on Windows and Mac computers).
Locating Zoom Video Files
The information below is for the default location. If you changed this location upon install, you will find the videos in that location.
On Windows
- View your computer files (press Windows Key + E) and then go to the C: drive.
- Choose Documents - Zoom
- Select the folder with the appropriate date stamp
- Select the MP4 file. The default name will be mp4.
- If you recorded more than one meeting on the same date, each subsequent meeting will be numbered accordingly. (Ex: zoom_1.mp4, zoom_2.mp4)
- If you do not see the extensions, you can enable that by going to View then check File extension names.
On Mac
- Go to the Go menu - choose Go to Folder
- Select Documents - Zoom
- Select the folder with the appropriate date stamp
- Select the MP4 file. The default name will be mp4.
- If you recorded more than one meeting on the same date, each subsequent meeting will be numbered accordingly. (Ex: zoom_1.mp4, zoom_2.mp4)
Uploading Your Video to YuJa Media
- Login to iLearn
- Go to YuJa Media
- You can drag and drop the file into the YuJa Media window or choose the Upload option.
- You will see a progress bar at the bottom right of the screen showing your upload progress.
- Once it is uploaded, you can submit the file to the Assignments or Discussions.
The upload and the processing can take some time depending on the size of your video file and the upload speeds on the network you are using.
WebCam and Voice Only Presentation Using Video Note in iLearn
You have two options for a webcam only presentation. You can use the internal iLearn option for a Video Note or you can create a video via YuJa and just turn off the screen option. Here we will cover Video Note. See below for creating a video with YuJa.
If your video is less than 30 minutes, you can use the Record Video option in iLearn. You can find this in Assignments and Discussions. Depending on the type of assignment the instructor sets up, you will add the video differently.
You can distinguish the two types of assignments in the Submit description and by the fact that the Text Submission only has a text submission box and a File Submission requires you to add a file, audio, or video.
Assignment: Text-only Submission
If the assignment is only allows for Text Submission (no file upload allowed), you will want to do the following:
- You will want to go to the Assignment tool, under the Assessments menu, in iLearn.
- Click on the Assignment folder for the video assignment.
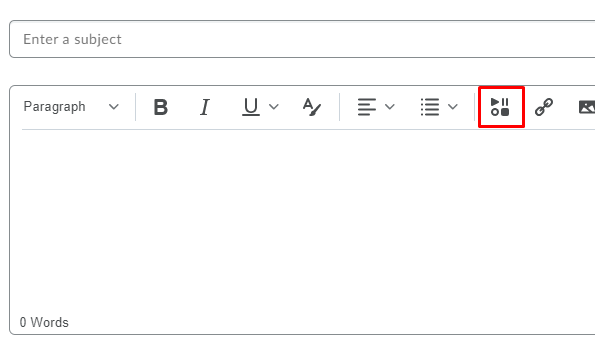
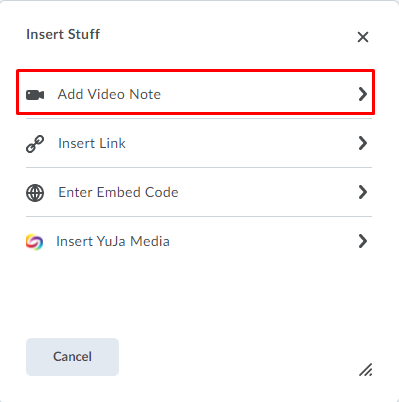
- Select the Insert Stuff button.
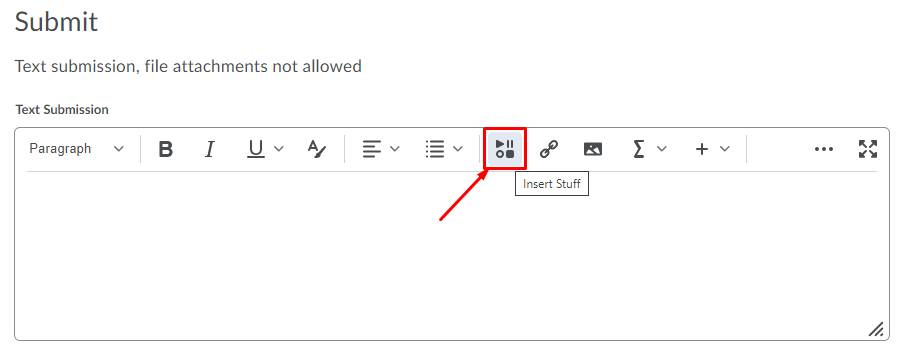
- Select the Video Note option and record your video and go through the process.
- Make sure to choose Allow for the browser to use your microphone and camera.
- Click New Recording.
- Record your video.
- Click Stop Recording.
- Select Next
- Enter a Title and Description. Choose en-US - English (US) for the Audio Language (or whatever language you recorded in) and check Automatically generate captions from audio.
- Click Next, then Insert.
- Submit the assignment.
Assignment: File Submission
If the assignment is a File Submission, you can simply select the Record Video button. You will probably need to allow the program to associate with your webcam and microphone.

- Make sure to choose Allow for the browser to use your microphone and camera.
- Click New Recording.
- Record your video.
- Click Stop Recording.
- Select Next
- Enter a Title and Description. Choose en-US - English (US) for the Audio Language (or whatever language you recorded in) and check Automatically generate captions from audio.
- Click Next, then Insert.
- Submit the assignment
Submitting for a Discussion Topic
If you are submitting to a discussion topic, you can follow the steps below.
- Select the Insert Stuff button.
- Select the Video Note option and record your video and go through the process.