
How to Use Reach: Uploading Video
If you would like to add short videos to your sign, you can do so! This tutorial is a step-by-step guide on how to add videos to your announcements playlist.
To start, you will need a video file on your computer, ready to upload. At this time, YouTube videos are no longer advisable to use. YouTube now has ads playing on all videos; it's important to remember that your video cannot be a monetized video, as your sign will be streaming the video directly from YouTube, and any ads will automatically play. We cannot play unapproved ads on TN Tech signage.
If you need assistance, let us know! We're happy to help.
Adding a video to your announcement playlist works very similar to uploading an image or a .pdf. When you arrive on the main Announcements page, you’ll see the usual four blue buttons at the top of the page:

Click the button that says “Add Videos,” and a box will pop up that says “Video Files.” You’ll be able to see any videos that have been previously uploaded in your area, as well as two options: “Upload Reach Video” and “Upload YouTube.”
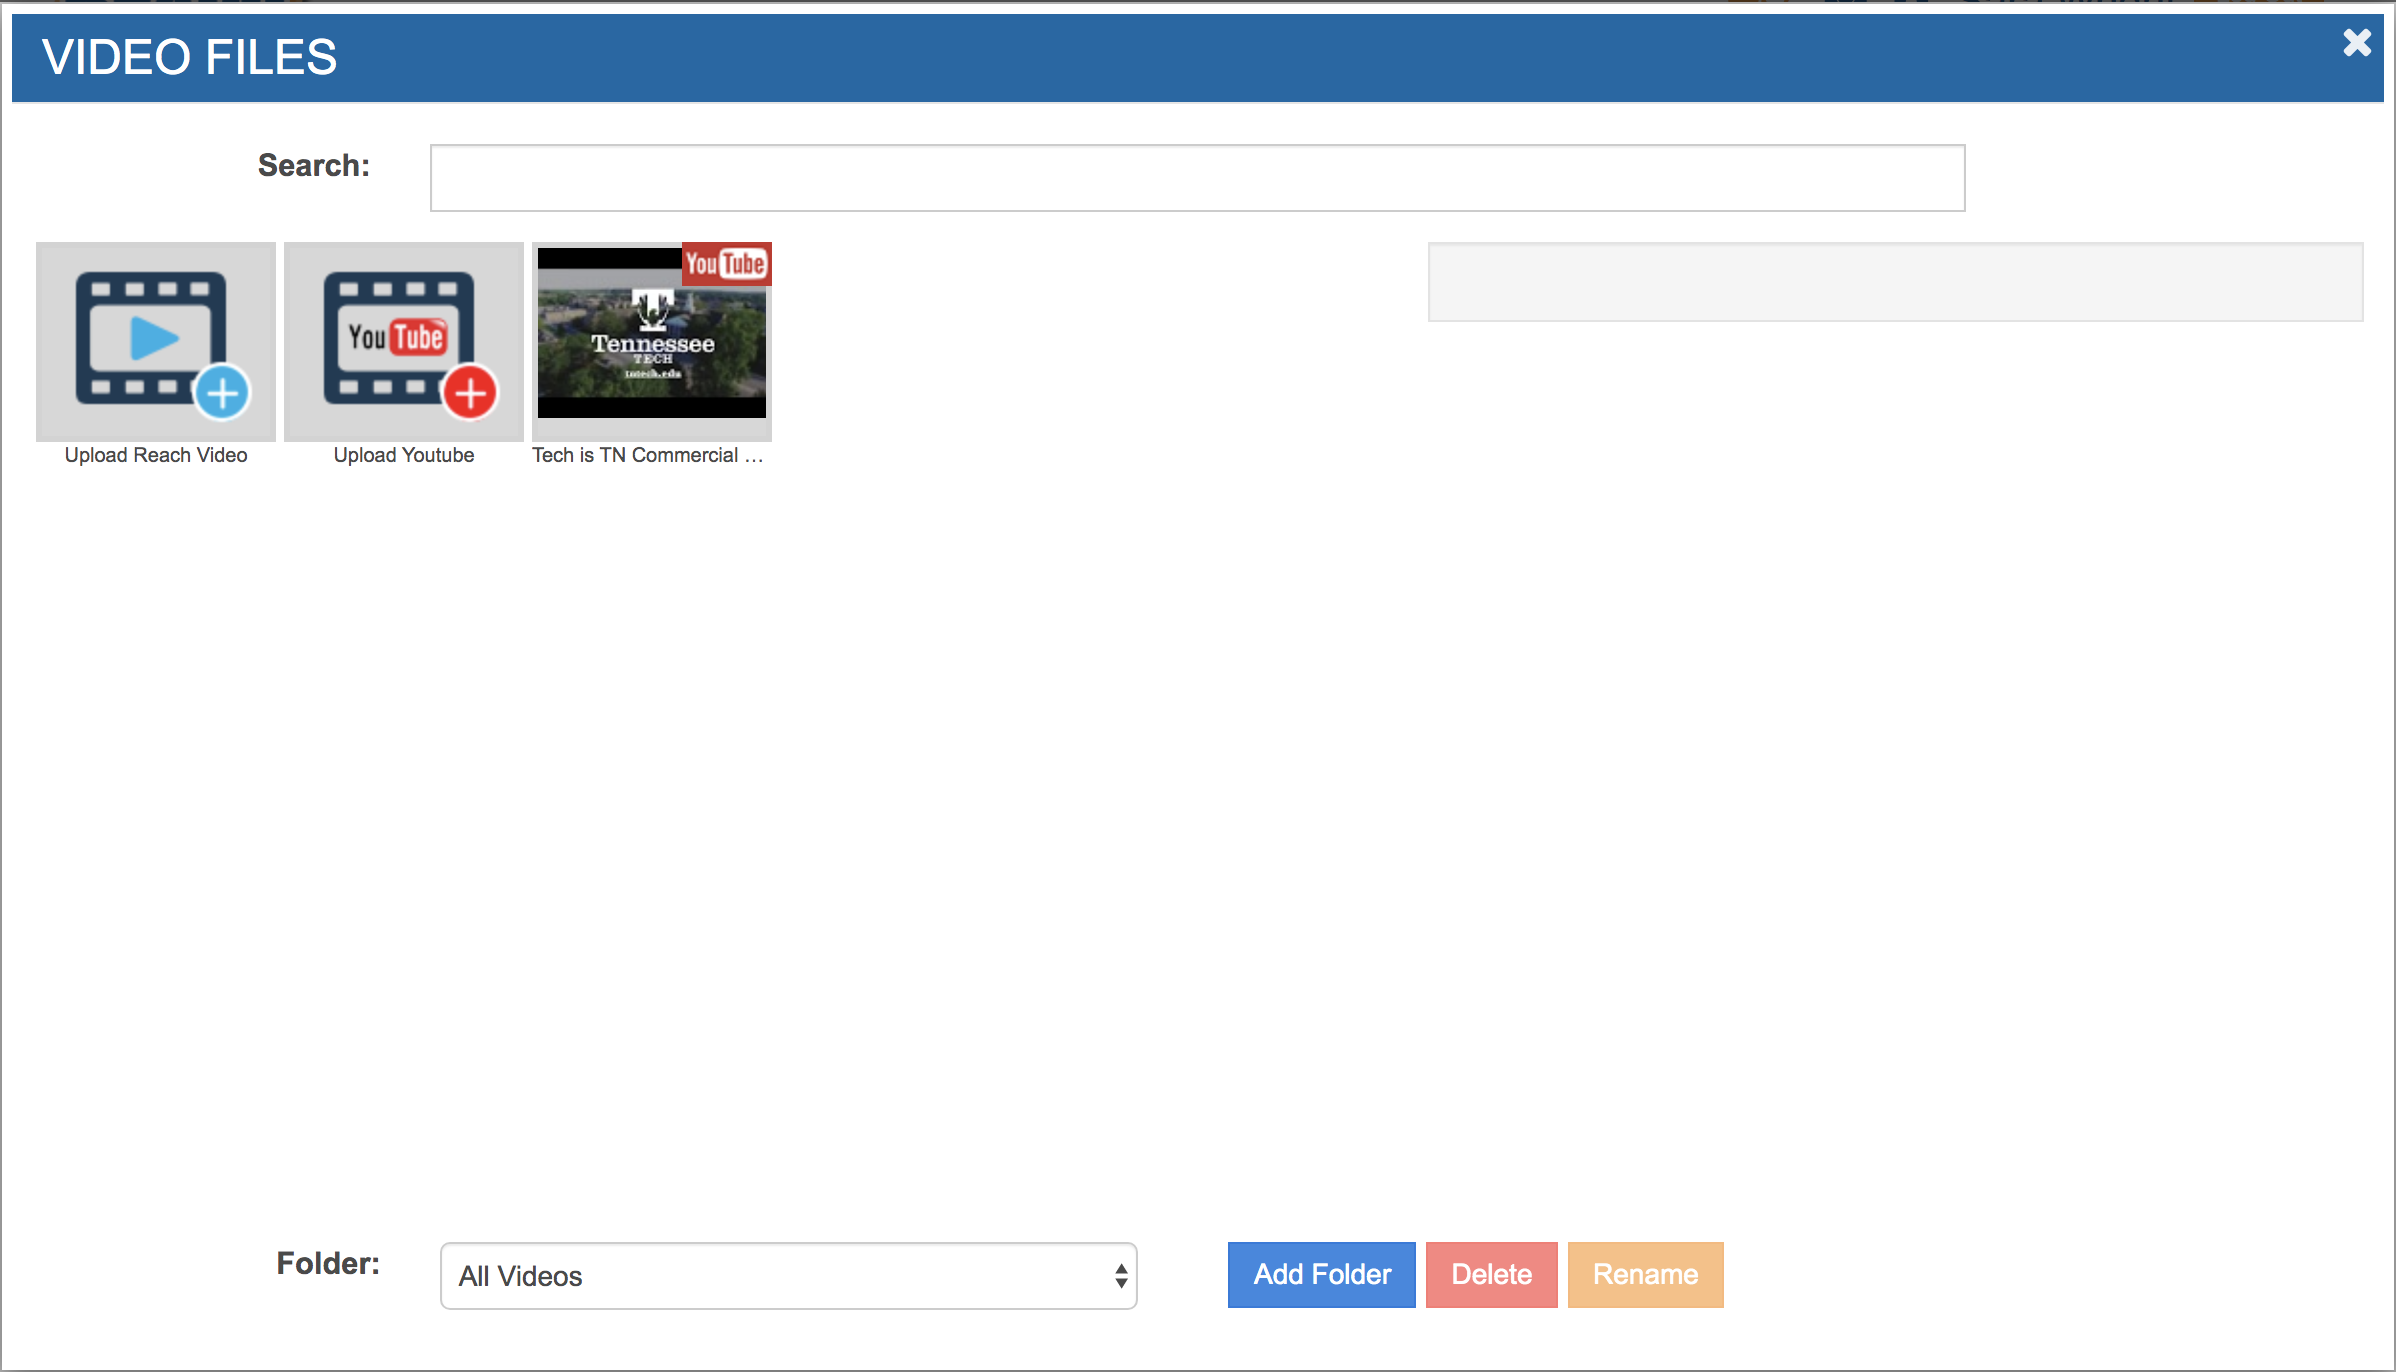
You can upload a video to Reach using the “Upload Reach Video” option. Reach does compress video, so it may be a lower resolution than the original after it has been uploaded, and it may actually shrink the size of the video too depending on the original size ratio. Browse to where your file is stored on your computer, and upload it to Reach; Reach will then begin to process your video.
Once your video is processed, it will appear in your Video Files. To add it to your playlist, click on the video.
A sidebar will appear listing the signs you have access to publish to. Select the signs you would like the video to play on. (If you have access to signs other than your own, be sure not to accidentally publish to their sign.) Click “Schedule,” and you will see a pop-up box that looks much like the standard announcements slide upload box.
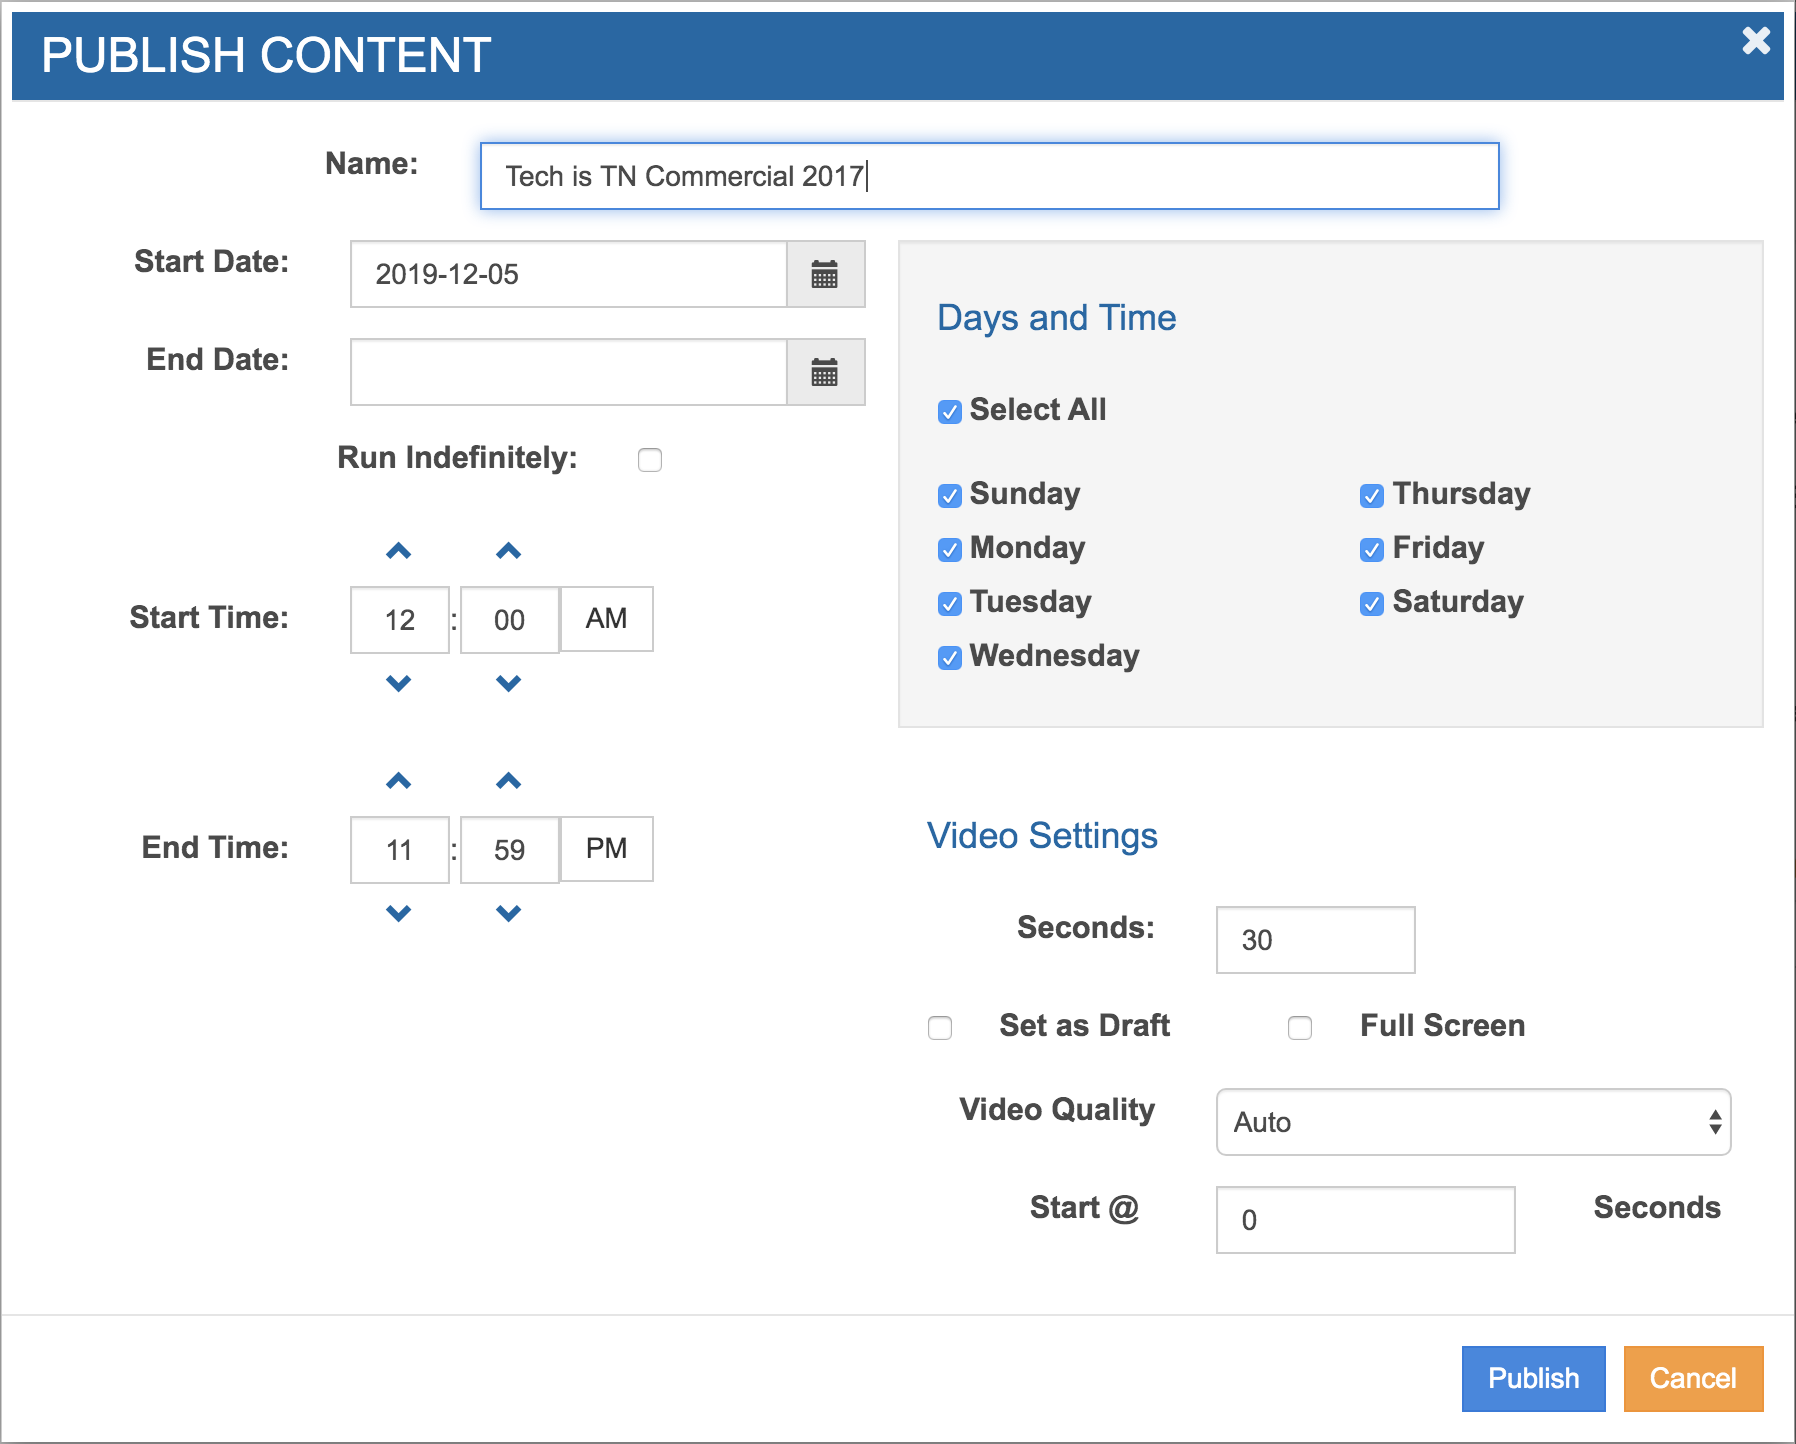
For uploading video, most of these options function identically. The differences are in the “Video Settings” section. For videos, Reach will automatically populate “Seconds” with the length of the video, and in general, you do not need to edit this; however, if you have uploaded a long video, this gives you the ability to show only a portion of it. For example, if you had uploaded a video, but only wished to play a portion of it, you would indicate in the “Start @” field at what timestamp you would like the video to start, and then specify in “Seconds” how long you would like it to play. Using this method, you can play any portion of a video you choose.
Videos in a 16:9 ratio, such as 1920x1080, should be published as Full Screen. Most videos are in a 16:9 size ratio like that of your signs, and may appear with odd black bars around them if you don’t publish as Full Screen. Videos that have been pre-sized to fit your templates at 1920x900 should not be published as fullscreen.
Video Quality should remain set to “Auto” to prevent videos freezing when internet speeds are slower.
Click “Publish,” and you’re done!