
Using Visix
Visix is Tennessee Tech's digital signage system. Once you have completed training, you will be given access to your signs and can begin adding and scheduling content. Visix organizes content into playlists, which play messages on rotation on your signs. The same playlist can play on multiple signs, or each sign can have its own playlist. Your playlists are set up for you. If you need changes made to your sign layouts or playlists, please contact the Web & Digital Media team.
› Navigating Visix
› Adding and Scheduling Content
› Managing Content Already on Your Sign
› Turning Off Notification Emails
Navigating Visix
Visix is supported in Chrome, Edge, and Firefox. Other browsers may work but may not provide full functionality. If you run into any trouble, please contact the Web & Digital Media team.
Logging into Visix
Go to https://cloud104.visix.com/manage/ and bookmark it for easy access later. You can also log in through Tech Express by selecting the Signage icon, then typing TTU. If you are already logged into Tech SSO, you will be signed in automatically; otherwise you will be asked to log in as usual.
You must complete training before your access is enabled. If you try to log in beforehand, it will not work.
The Overview Screen
When you log in, you will arrive on the Overview screen. This is where you will do most of your work.
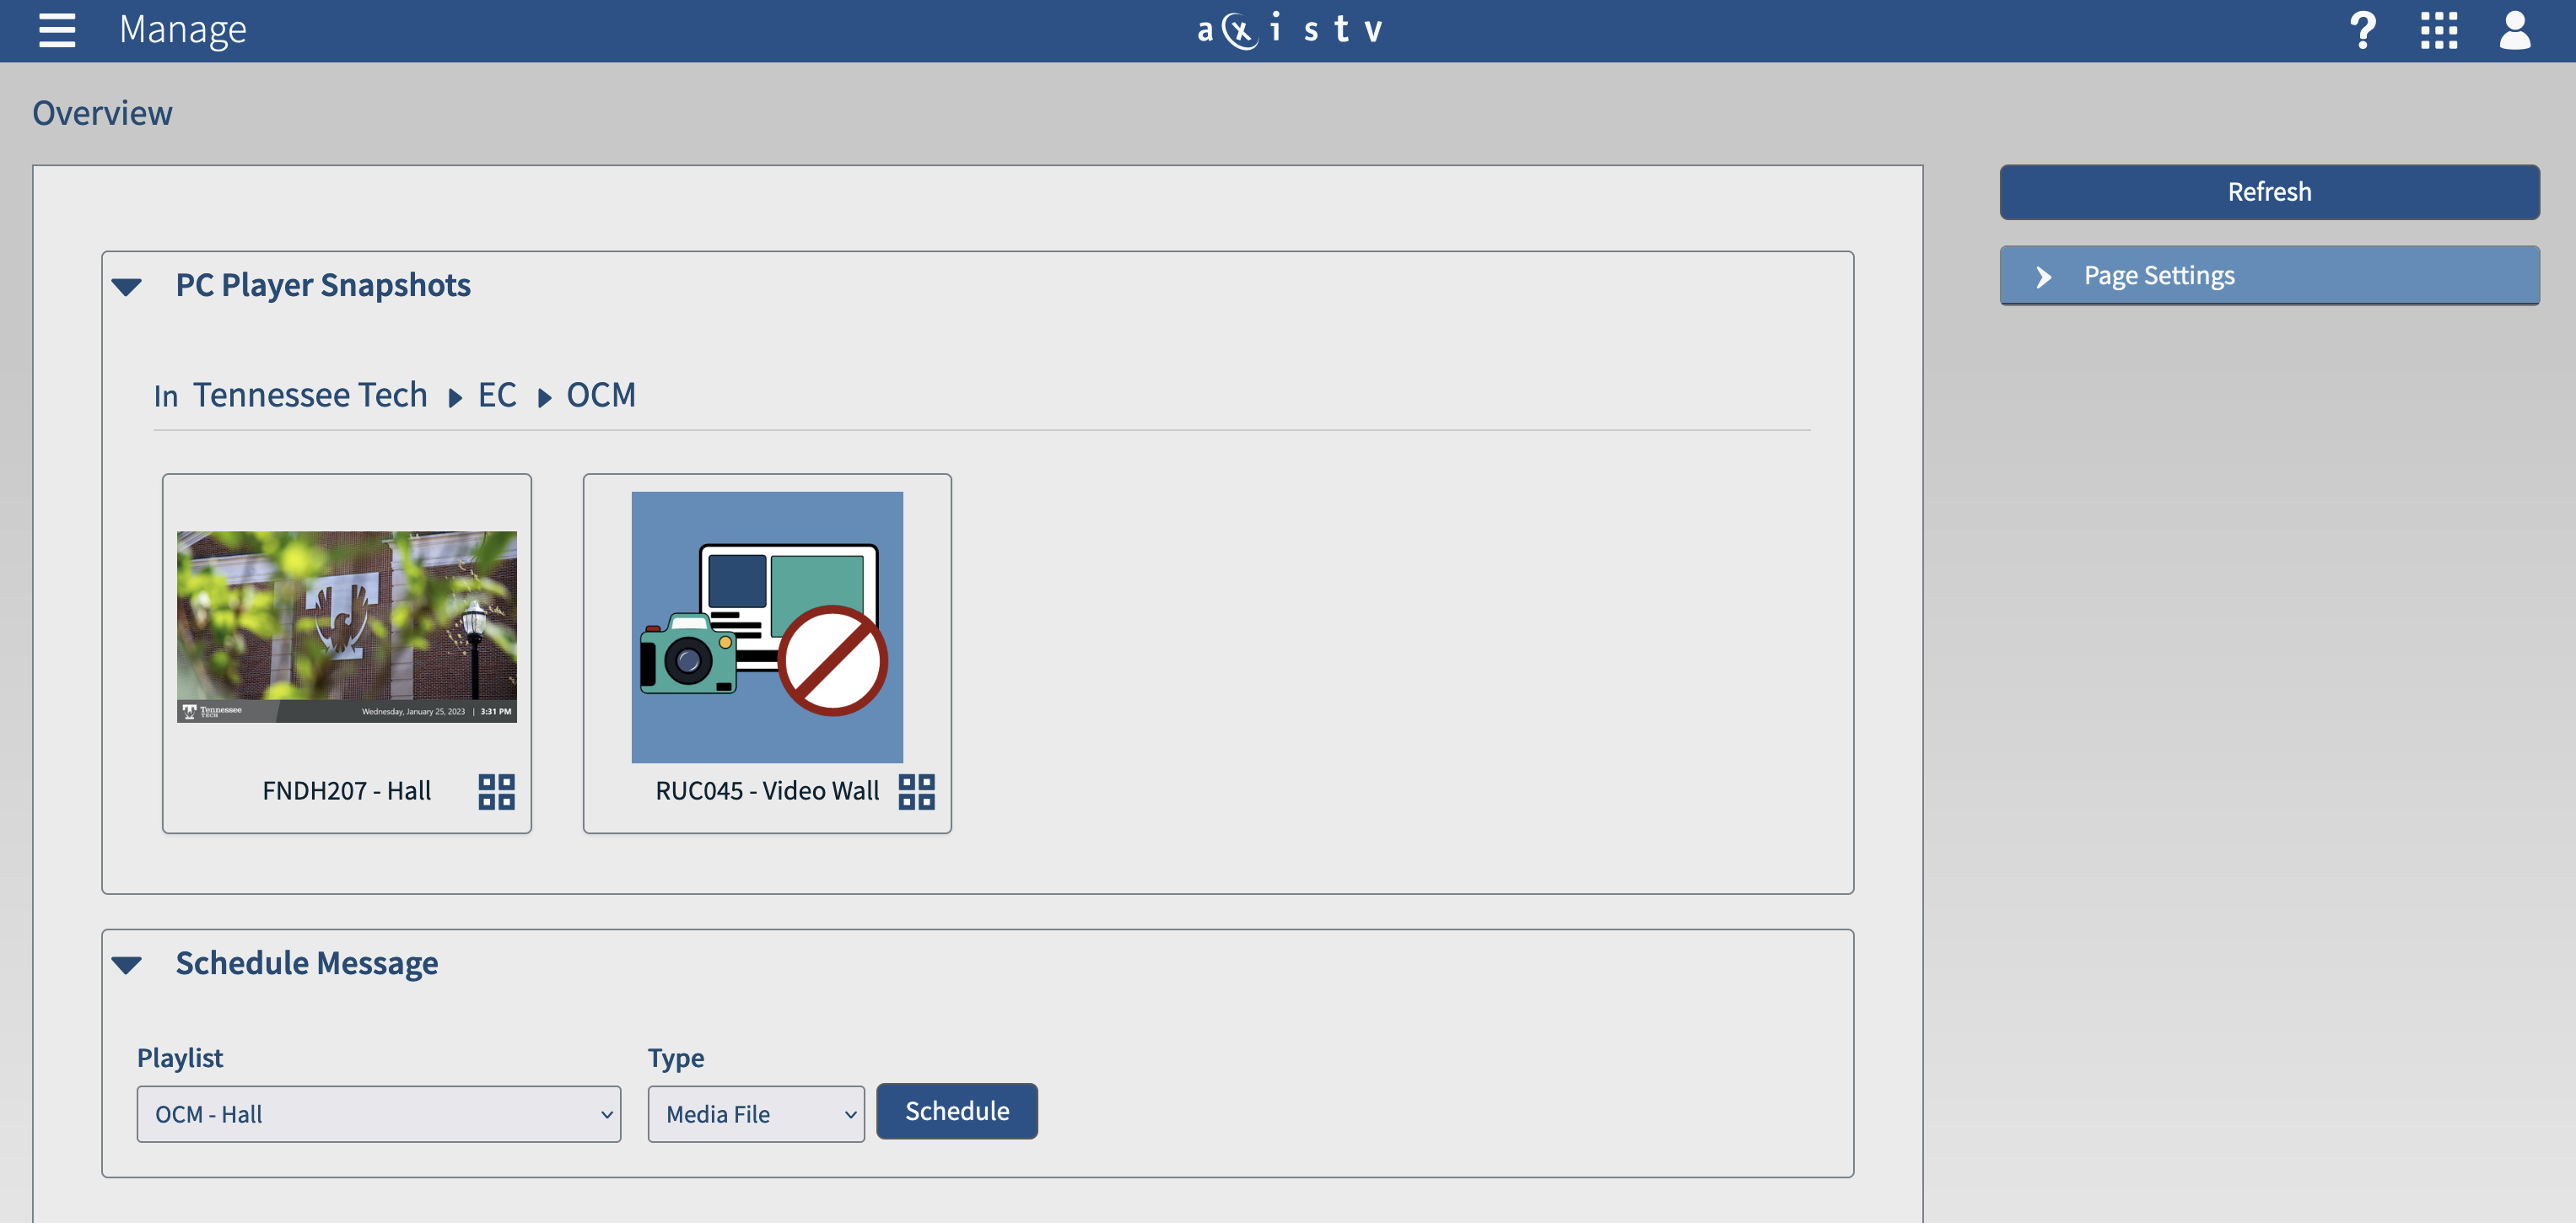
Player Snapshots show each sign you have access to and preview the content currently playing. Snapshots can take about ten minutes to update, so do not worry if newly added content has not appeared yet. If you manage signs in more than one area, use the arrows to move between them.
Add Content is the button you will use to upload and schedule graphics. See Adding and Scheduling Content below.
The Side Menu is found under the menu icon in the top left corner of your screen. It contains several options, but you will only need three: Overview to preview your signs and add content, Playlists to manage content already scheduled, and Artwork to manage reusable files.
Adding and Scheduling Content
Before you upload, make sure your graphic is sized correctly for your sign:
- Standard horizontal signs: 1920 x 950 pixels
- Standard vertical signs: 1080 x 1790 pixels
You will primarily upload images, but PDFs, PowerPoints, and videos are also supported. Keep in mind that people walk past your sign in a few seconds, so a single clear graphic works far better than a text-heavy document.
Note: You will not be creating your graphics inside Visix. Prepare them beforehand in a program such as Canva. For recommended programs and learning resources, see our Digital Signage Resources page. We are always happy to walk you through the basics on a one-to-one call.
Step by Step
- From the Overview screen, select Add Content.
- Select Media Files.
- Select Choose Files, pick one or more files from your computer, and select Open. You can also drag files directly onto the Choose Files area.
- Check the file name, then select Import. A progress screen will show while your file uploads.
- Set your playback options:
- Leave More Information URL blank.
- Leave Preserve aspect ratio checked. Clearing it will stretch and distort your graphic.
- Set Play to 7 seconds for images with little or no text, or 10 seconds for images with text.
- You can leave Transition, Opacity, and Volume at their default settings.
- Select the playlist or playlists you want your content to appear on. You can select more than one.
- Choose a Schedule. See Choosing a Schedule below.
- Select Add Content to finish. This step is required. If you skip it, nothing is saved. You will see a Succeeded! message when your content has been added.
- Select Finished to return to the Overview screen.
Important: Do not rename your file's extension (the .jpg, .png, or .mp4 at the end of the file name). Visix uses the extension to decide how to play your content.
Your content is always added to the end of the playlist. If you need it in a different position, you can reorder the playlist afterward. See Managing Content Already on Your Sign.
Choosing a Schedule
- Always — Your content plays continuously in the rotation until you remove it manually.
- One Time — Your content plays once, within a start and end date and time that you specify.
- Recurring — Your content reappears on the days and times you specify, such as every weekday from 8:00 a.m. to 10:00 a.m.
For One Time and Recurring schedules, you can extend playback afterward using the 1 Day, 1 Week, and 1 Month buttons. Leave Times are local checked; all Tennessee Tech signs are in the same time zone.
Media Files and Artwork
Visix handles uploads in two ways, and it helps to know the difference:
Media Files are uploaded during the scheduling process, as described above. This is the method you will use nearly all the time, and it is best for temporary or date-specific content.
Artwork is content saved in the Artwork section of Visix, found under the side menu. Artwork stays available even after you remove it from a playlist, so it is useful for graphics you reuse regularly. To add artwork, open Artwork from the side menu and select Import. You can upload several files at once this way, but you cannot schedule them at the same time; you will schedule them afterward from the Playlists screen.
Managing Content Already on Your Sign
To change or remove content that is already scheduled, open Playlists from the side menu and select the playlist you want to edit. From there you can:
- Reorder content by dragging and dropping items into the order you want.
- Change a schedule by selecting an item and choosing the option to adjust its schedule.
- Remove content that is no longer needed.
Remember that snapshots on the Overview screen take about ten minutes to refresh, so give your sign a few minutes before checking your changes.
Turning Off Notification Emails
By default, Visix sends an email whenever there is a brief interruption between the system and your sign. These emails are frequent and rarely indicate an actual problem, so we recommend turning them off and checking your signs visually or through the snapshots on the Overview screen instead.
To turn them off, select the user icon in the top right corner of your screen and open your profile settings. Find the Notifications section, locate Alarms, and uncheck the notification options. Be sure to save your changes.
More Help
Visix provides detailed step-by-step documentation for scheduling content:
› Visix guide to scheduling media files
› Visix guide to scheduling media files with drag and drop
› Visix guide to importing artwork
If you have questions or need changes to your playlists or sign layouts, contact the Web & Digital Media team.